2017.02.04 Day 1 Week 6
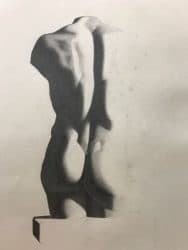
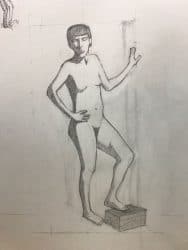
I spent six hours today working on the left shoulder blade of my Bargue #2. This one is complex and is taking a lot of patience. I listened to Leonard Cohen, Merle Haggard, Chopin and Dylan’s Bootleg Tapes Volume 1 during my pencil lead dance on the paper. I suspect I have at least one more week to go.

 I thought it might be interesting to some to actually show how I prepare my pencils for the beginning of each session. This set takes 15-20 minutes at the beginning of the day then periodically I update each one as it shortens and blunts. The ideal is to have at least 2.5 cm of lead showing (we use Staedtler pencils; a few are using Derwent). Using a retractable box cutter (thin blade), one begins by shaving as close to parallel to the pencil shaft axis as possible. With a very sharp blade, tiny shavings can be removed preserving the integrity of the lead shaft. It is crucial not to nick the lead shaft since this causes structural damage and will cause the shaft to break quite easily. In addition, it is crucial not to drop the pencil since this will internally fracture the lead shaft and no longer allow one to prepare the lead in this manner.
The longer one can make the lead, the shallower the angle of taper on the axis of the lead shaft. This enables one to get a very sharp point—almost like a hypodermic needle point. It also forces a totally different drawing style—one that demands care, precision, near verticality of the pencil, and subtlety of movement. Once I “unlearned” my normal pencil drawing style, this technique affords incredible control over the nuances of the required 0-9 value ranges within short distances. The lead holder allows me to keep the point in a precise place and minimize the risk of smearing from my palm. The kneaded eraser is pinched to form various precise shapes to precisely extract a spot of lead that is out of the value range.
For dinner I made a carrot, potato, fennel and onion soup flavored with marjoram, bay and rosemary. A Chianti Riserva from Le Chaintigante rounded out the evening. Looking forward to my FaceTime call with Lea.
2017.02.05 Day 2 Week 6
Today was quiet. Rested, did laundry, slept and then cooked dinner for friends from Minnesota and Philadelphia who are studying at the Florence Academy of Art. Simple day. Just want I needed. My FaceTime Lea last night was the elixir and rejuvenator I needed. Perfect antidote to a feeling of loneliness that crept in after being quite sick earlier in the week.
2017.02.06 Day 3 Week 6 Class #21
Good day today. I got some much needed rest and relaxation on Sunday. My body is thinking me today.
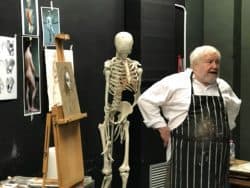
First, we had a lecture by Michael John Angel about using “capitrua” over a grisaille underpainting. Some interesting take aways:
- Never paint what you can not see. Human nature causes us to want to paint what we expect to see.
- In his capitura mix, the maestro uses raw umber with a medium with his personal formula: 2 parts liquin, 1 part linseed oil and 2 parts turpentine (or mineral spirits). Raw umber tends towards the yellow hue and burnt umber to the orange. It is best to have to work the paint; if it is too runny then it will not work well. All umber paints need a medium. “Don’t be afraid to let the paint do what it does. It will do the work.”
- The proper way is to not paint the outline. Mass drawing is best; do not be content with filling in the lines—you are not seeing the forms.
- After applying the capitura the underpainting should be barely or not visible at all. The wiping of the capitura from the under painting will reveal the shapes. At this point the wiping can be used to establish the modeling.
- Pay particular attention to the turning tones; not the bounded edges.
- The less medium you can use the better.
- Flesh tones are relatively simple: red umber with white and cadmium red (sometimes Persian red). For the turning tones add raw umber. Keep the hue constant.
- Colors should be ordered in the painting. Do not think that dabbing color “here and there” will achieve a pleasing harmony. Humans react positively to ordered color.
- The “first painting” establishes where the tone is; the “second painting” is the actual painting.

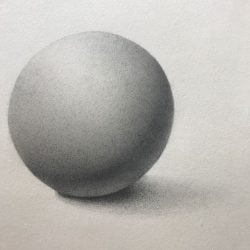
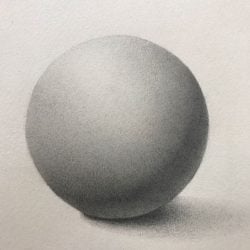
After the lecture I worked another 2 hours on the value sphere and the Bargue #2. Both are getting closer. I am hoping the sphere will be done tomorrow. The Bargue might be done in 5 or 6 days.
 In the afternoon we had a 2 1/2 hour pose. Our regular teacher, Davide Barbini was ill so the maestro (Michael John Angel) was our substitute. A totally different teaching style. Davide is very hands on; maestro was more strategic. He also was more interested in the “design” of the pose than the accuracy. For example, 15 minutes before the end of the session, he said I did not have a good sweep from the torso through the head because I was being too literal (an oft heard criticism). He suggested a) enlarging the head (another problem I have along with small feet), b) shifting it to the right and c) reworking the hair line. Presto: it was better. Lessons: do not think anything is precious; be prepared to erase or redo anything; remember to step back and evaluate the emotional appeal of the “designed pose.”
In the evening I worked on anatomy lessons after a simple dinner of soup, salad and baguette with a Tascante Ghiaia Nera (nerello mascalese) 2014 from Sicily.
2017.02.07 Day 4 Week 6 Class #22
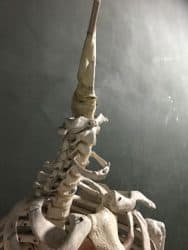
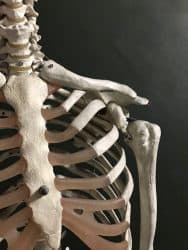
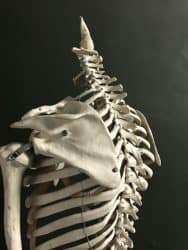
This morning was spent simply: refining the value sphere and continue to work on my Bargue #2. In the afternoon, our instructor was still out ill so we were mainly on our own to work on a 3 hour pose. In the evening, I continued with the anatomy class. Tonight we focused on the neck, shoulders and upper arm. The key muscles we learned were the Trapezius, Sternocliedomastoid, Levator Scapulae and the Platysm. After our 1 hour lecture we then focused on drawing these from a live model.

2017.02.08 Day 5 Week 6 Class #23
This morning I finished the value sphere and continued to work on my Bargue #2. In the afternoon we did another long pose from the same model, same pose but new easel (changed our vantage point.) Things I have to work on:
- Slow down
- Spend time on the measurements
- Watch the relative widths of the limbs
- Don’t loose the gesture

2017.02.09 Day 6 Week 6 Class #24
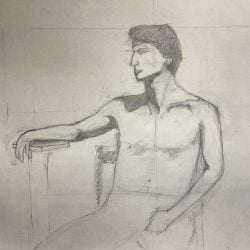
This morning I finished the value sphere and continued to work on my Bargue #2. In the afternoon we started a 2 day pose. It was a great day. The afternoon pose was tough–since it was horizontal seated pose. This type of pose is really hard to get the dimensions correct since there is not the tradition 1/4 divisions. I SLOWED down and the results showed. I managed to get the vertical dimensions right the first time; but I had to rework the horizontal several times.


2017.02.10 Day 7 Week 6 Class #25
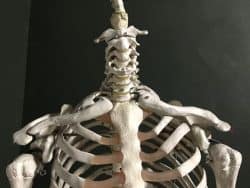
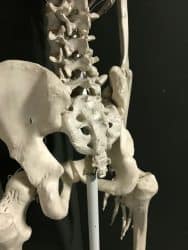
In the morning we were given a lecture by one of our instructors: Part 1 of the torso. The main reference terms we need to memorize are:
Superior: looking up
Inferior: looking down
Front: Anterior
Back: Posterior
Side: Lateral looking at the outside of a body limb
Inside: Medial looking at the outside of a body limb
Superficial: Protruding bony parts like the elbow
Subcutaneous: Bony parts below the surface of the skin like the knuckle
Upward moving: Flextion (bowing is also flection and extension)
Downward moving: extension
Lifting the arm: abduction
Lowering the arm: aduction
Hand with thumb up: Subnation
Hand with thumb down? pronation


I left the second day of the two-pose early to catch a train to Rome for the weekend. I was able to finish the shadow shapes and articulation. I will work on the tonal rendering early next week in the evenings to catch up.
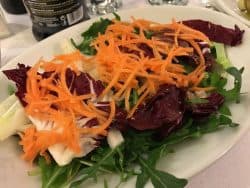
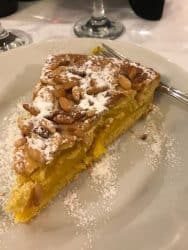
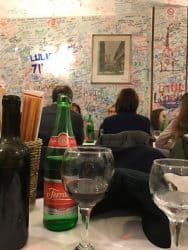
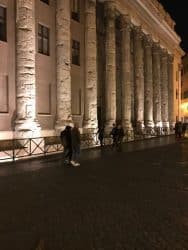
After settling into my hotel (Relais Orso) new the Piazza Navona, I walk to the Hysteria Romana restaurant that was recommended by Maestro John Michael Angel. He was right. It was lovely typical Italian meal. I was the only non-Italian in the restaurant as far as I could tell. Lovely full moon on the return walk home.


Outstanding work, keep it up. Great Barques, I especially love the painting! Thanks for sharing.